

Getting Started – Developer Tutorial
This tutorial will get you up-and-running with a new Adobe Experience Manager (AEM) project. In ten to twenty minutes, you will have created your own site and be able to create, preview, and publish your own content, styling, and add new blocks.
Prerequisites:
- You have a GitHub account, and understand Git basics.
- You understand the basics of HTML, CSS, and JavaScript.
- You have Node/
npminstalled for local development.
This tutorial uses macOS, Chrome, and Visual Studio Code as the development environment and the screenshots and instructions reflect that setup. You can use a different operating system, browser, and code editor, but the UI you see and steps you must take may vary accordingly.
TIP: If you would like to get your AEM project started the fastest way Adobe offers with content you already know, use the AEM Modernization Agent. Just create your boilerplate repository and then collaborate with the agent to import your site.
Get started with the boilerplate repository template
The fastest and easiest way to get started following AEM best practices is to create your repository using the Boilerplate GitHub repository as a template.
https://github.com/adobe/aem-boilerplate

Click the Use this template button and select Create a new repository, and select the user org that owns the repository

We recommend that the repository is set to public.
The only remaining step in GitHub is to install the AEM Code Sync GitHub App on your repository by visiting this link: https://github.com/apps/aem-code-sync/installations/new
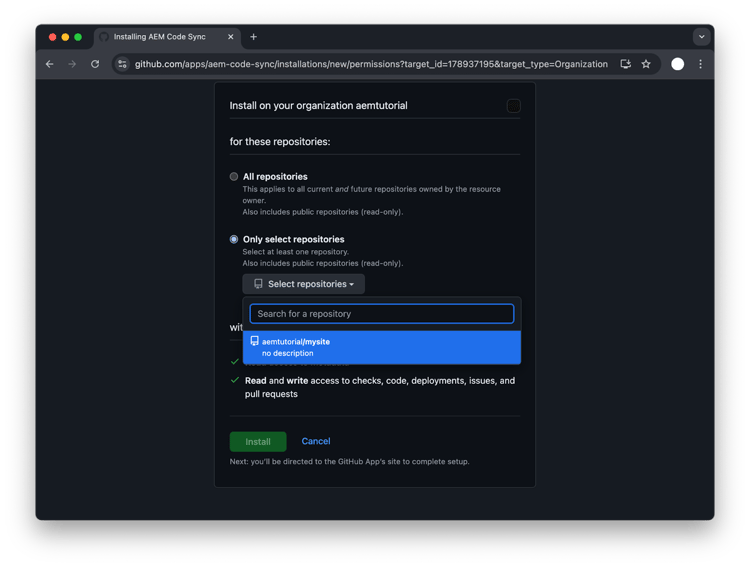
In the Repository access settings of the AEM Code Sync App, make sure you select Only select Repositories (not All Repositories). Then select your newly created repository, and click Save.
Note: If you are using Github Enterprise with IP filtering, you can add the following IP to the allow list: 3.227.118.73

Congratulations! You have a new website running on https://<branch>--<repo>--<owner>.aem.page/ In the example above that’s https://main--mysite--aemtutorial.aem.page/

Edit, Preview and Publish your content
Navigate to Author on https://da.live/ and find the example content.

Edit content and preview and publish content as needed. For more information on authoring see https://da.live/docs.

Install Sidekick
To interact with AEM as an author across environments we strongly recommend installing the Sidekick Chrome extension. Find the Chrome extension in the Chrome Web Store.

After adding the extension to Chrome, don’t forget to pin it, this will make it easier to find it.

Start developing styling and functionality
To get started with development, it is easiest to install the AEM Command Line Interface (CLI) and clone your repo locally through using the following.
npm install -g @adobe/aem-cli
git clone https://github.com/<owner>/<repo>
From there change into your project folder and start your local development environment using the following.
cd <repo>
aem up
This opens http://localhost:3000/ and you are ready to make changes.
A good place to start is in the blocks folder which is where most of the styling and code lives for a project. Simply make a change in a .css or .js and you should see the changes in your browser immediately.
Once you are are ready to push your changes, simply use Git to add, commit, and push and your code to your preview (https://<branch>--<repo>--<owner>.aem.page/) and production (https://<branch>--<repo>--<owner>.aem.live/) sites.
That’s it, you made it! Congrats, your first site is up and running. If you need help in the tutorial, please join our Discord channel or get in touch with us.
To get you to a live website as fast as possible, this tutorial uses Document Authoring as the content source. Universal Editor can also be configured for your project, to provide a WYSIWYG + Form-based authoring option.
Next Steps
Now that your site is up and running, choose how you want to continue:
- Build your first block - Create, style, and deploy a custom block from scratch.
- Build with AI - Configure your project for AI-assisted block creation and development.
Previous
Build
Up Next