
Snapshots
Content authors and editors need to balance creating new content with updating existing content, often across locales. While one version of a page is live for your readers, you might be working on an update that must go out at a certain time, such as the start of a new promotion. All of these changes, including gathering feedback, approval, and reviews, must be handled before any updates go out. Snapshots help you manage coordinating such updates.
Creating Snapshots
- Copy the URL(s) of the pages for which you wish to make a snapshot and determine the path of the organization and site you wish to create a snapshot for. In our example, we want to create a snapshot for this page
https://main--frescopa--exp-workspace.aem.live/drafts/bohnert/holiday-promotion, so we know that the path is/exp-workspace/frescopa. - Under Apps, select Snapshots.
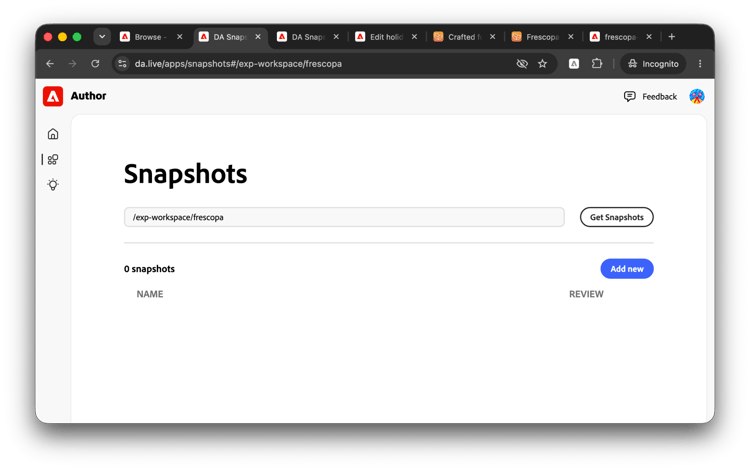
- In the Snapshots window, paste the path of the site and click Get Snapshots to retrieve a list of snapshots for that site.
-
If you are just starting your project, there will not be any and you can click Add new in the Snapshots window.
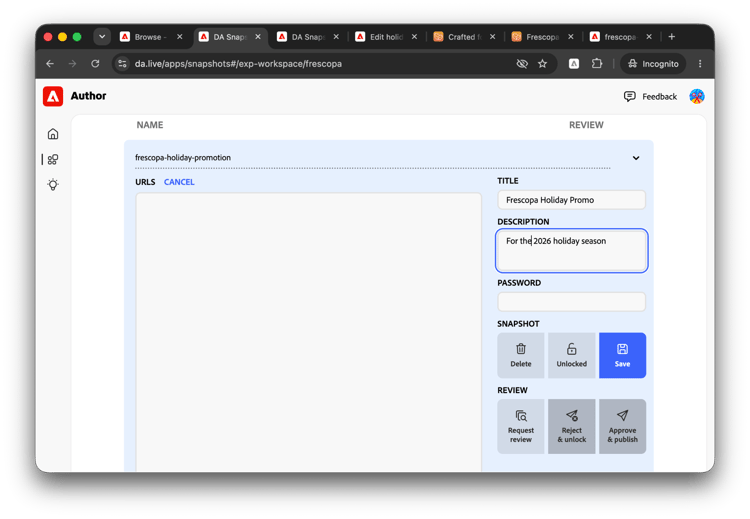
- In the form that opens, paste in the URL(s) of the pages you want to include in this snapshot. You can also provide:
- Enter snapshot name to give your snapshot a descriptive name
- This is a unique identifier for the snapshot.
- Title to give your snapshot a descriptive title
- Description to provide a more lengthy description of the purpose of the snapshot
- Password to protect the content of the snapshot from those who are not authorized to view it (recommended)
- Enter snapshot name to give your snapshot a descriptive name
-
Click Save to save the snapshot.
Once a snapshot is created, each page that was included in the snapshot receives an .aem.reivews URL. In our example, the review URL is https://main--frescopa--exp-workspace.aem.reviews/drafts/bohnert/holiday-promotion.
The .aem.reviews URLs are intended to be shared with the reviewers.
Managing Snapshots
- Inspect the URL of the page for which you wish to manage its snapshots and determine the path of the organization and site. In our example, we are working on this page
https://main--frescopa--exp-workspace.aem.live/drafts/bohnert/holiday-promotion, so we know that the path is/exp-workspace/frescopa. - Under Apps, select Snapshots.
-
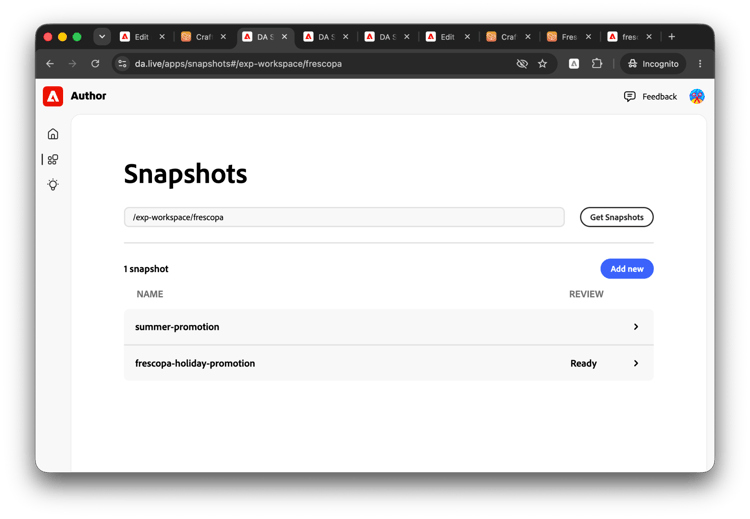
In the Snapshots window, paste the path of the site and click Get Snapshots to retrieve a list of snapshots for that site.
-
Click the chevron next to the name of a snapshot in the list to see its details and manage it.
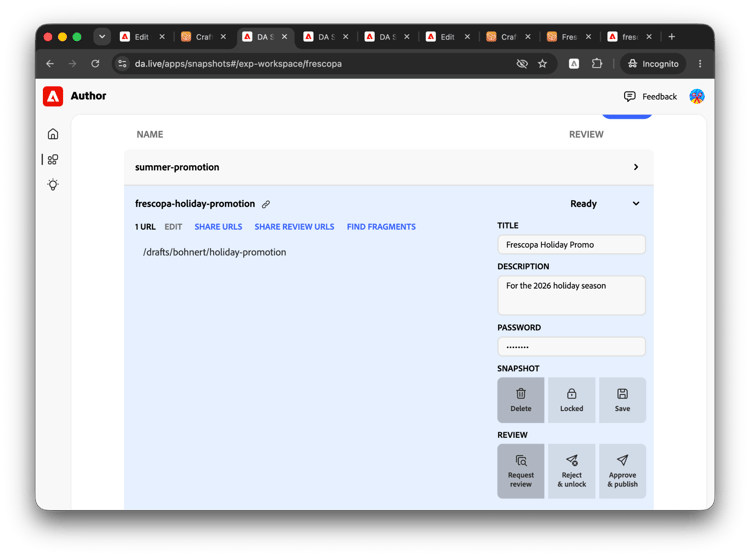
You can inspect and modify the snapshot including:
- Edit the pages included in the snapshot by clicking Edit (provided the snapshot is not locked).
- Click Share URLs to copy a list of the pages included in the snapshot to the clipboard.
- Click Share Review URLs to copy a list of the review pages included in the snapshot to the clipboard.
- Search the snapshots for Content Fragments by clicking Find Fragments.
- Since Content Fragments are managed separately, they are not included in the snapshot and therefore it can be useful to identify if any are included in the pages of the snapshot.
- Modify the Title, Description, or Password and save the changes by clicking Save.
- Lock the snapshot by clicking Lock so that it can not be modified.
- Delete the snapshot.
Reviewing and approving
Generally, review and approval follows this process.
- Once the snapshot is created and is ready for review, click Request review in the details view of the Snapshots window.
- This will automatically lock the snapshot.
- Note that the status of the snapshot changes to Ready to indicate that it's ready for review.
- Click Share review URLs to copy the review URLs (
.aem.reviews) to the clipboard. Share them with your reviewers.- Note that if the snapshot has a password set, a reviewer will need the password to access the URLs
- As you receive feedback you may decide the content needs more work and can click Reject & unlock to unlock the snapshots and set the status to Rejected.
- If no more changes are needed and the reviewers approve the content, you can click Approve & publish.
Publishing can not be undone, so you will need to confirm your decision in a dialog before publishing. Approving and publishing creates a new version of the page.
Permissions
To learn more about snapshot permissions, see https://www.aem.live/docs/snapshots-reviews#permissions
Scheduling Snapshots
Early-access technology
Ask us about this feature from the AEM Sites labs on your Teams or Slack channel!
If you wish to enable snapshot scheduling, please reach out to Adobe to get it enabled for your organization. Once enabled, a date and time can be chosen to publish a snapshot.