
Enabling focal point
Images are a vital part of any digital experience. Most images have their main subject centered or nearly-centered, which means they can be automatically cropped to fit various blocks or page layouts. However, sometimes main subjects, or focal points, are further from center and any cropping should be relative to these focal points. When enabled at the block level, authors can define focal points for images within the UI when adding blocks.
To use the focal point feature:
- The block must support focal points in its client-side code.
- The block must be enabled in your library with the focal point feature.
Supporting focal points in blocks
Focal points are stored as x,y coordinates in a data-title attribute of the img object, separated by a colon and delimited by a comma. For example:
<img loading="lazy" alt="" data-title="data-focal:46.70,17.75" .....>
Your client-side code for the block must use this data to set the focus of the image, similar to the following.
function setBackgroundFocus(img) {
  const { title } = img.dataset;
  if (!title?.includes('data-focal')) return;
  delete img.dataset.title;
  const [x, y] = title.split(':')[1].split(',');
  img.style.objectPosition = `${x}% ${y}%`;
}
For a reference, please see the example code in Author Kit.
Enabling the focal point feature in your library
If your block supports focal points, your authors can use it in the UI once the feature is enabled for the block in your library.
In your blocks sheet, add a column called features if it does not yet exist. In this column add the value focal-point to every block that should have the feature enabled. For example, your blocks sheet might look something like the following if you want to enable focal points for your hero block.
| name | path | features |
Hero |
https://content.da.live/.../hero |
focal-point |
Section Metadata |
https://content.da.live/.../section-metadata |
Please see the document Set up library for more information about configuring blocks in your library.
Using the focal point feature
Once your block has the client-side code support and is enabled in the library with the focal point feature, authors can set focal points for images in blocks within the UI.
- Edit a page.
- Switch the editor to Content mode.
-
Click the crosshairs icon that appears at the bottom-left of the image.
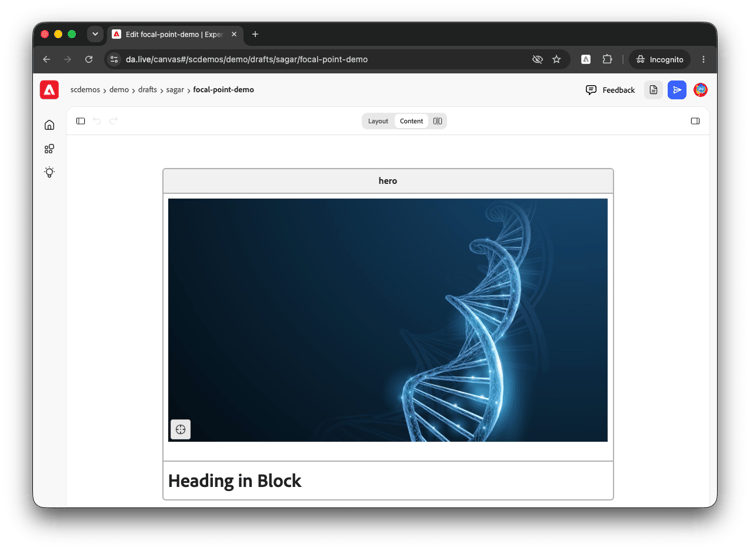
-
Drag the red target to where you wish the focal point to be. The x,y coordinates update automatically. You can also adjust the coordinates manually.
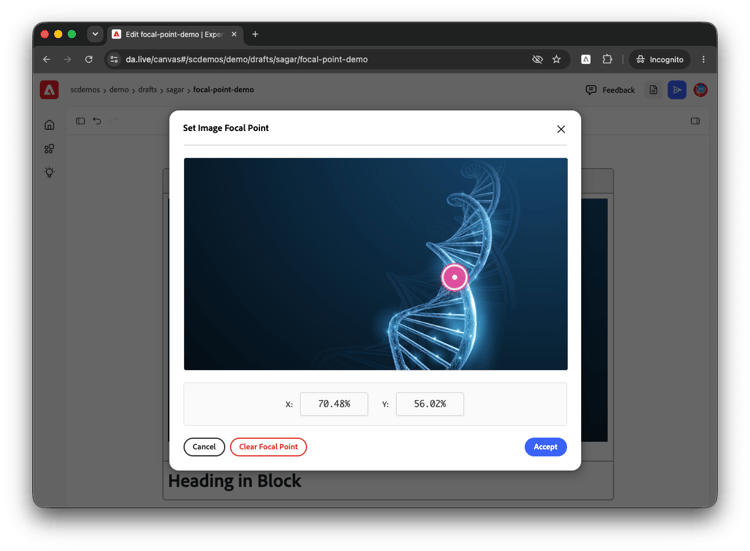
- Click Accept to save the focal point or Clear Focal Point to remove a set focal point.
Please see the document Editing documents for more information about editing pages.