
Send to Adobe Target
The Experience Workspace Send to Adobe Target integration allows authors to push fragments or full pages directly to Adobe Target for personalization and experimentation use cases.
Prerequisites
- An Adobe Target account
- An Adobe Developer Console project with an Adobe Target API integration
Overview
Configuring the Adobe Target integration requires these steps.
- Create an Adobe Developer Console project with appropriate API credentials.
- Add Developer console credentials to Experience Workspace.
- Turn on the Send to Adobe Target plugin for the Prepare menu.
Create an Adobe Developer Console project
These instructions highlight the important steps for creating the necessary Adobe Developer Console project and assume basic familiarity with Adobe Developer Console, Adobe Target, and the Admin Console. Please see their respective documentation for further information.
-
Log into the Adobe Developer Console at https://developer.adobe.com/console
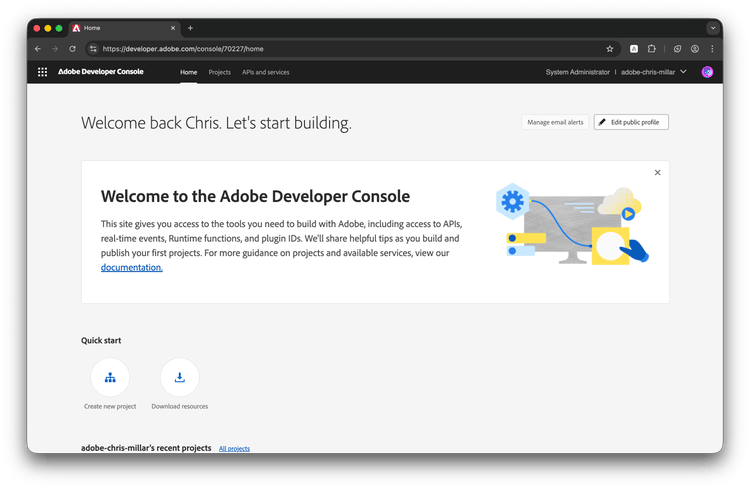
-
Create a new project, which will initially be untitled. You can rename it as appropriate.
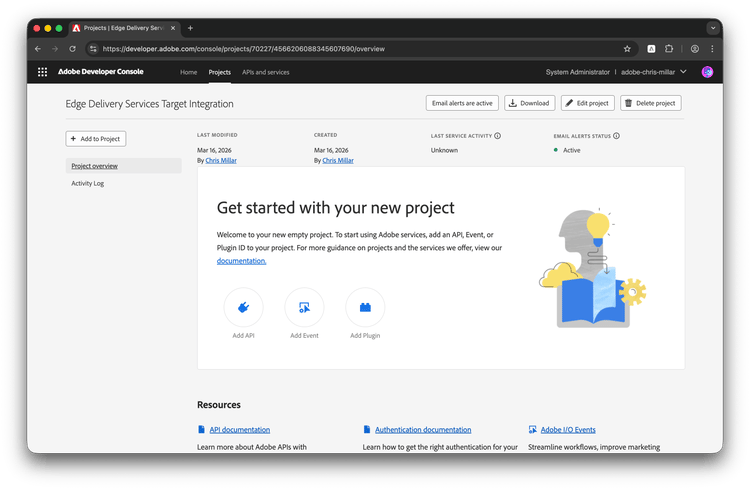
- Click Add API.
-
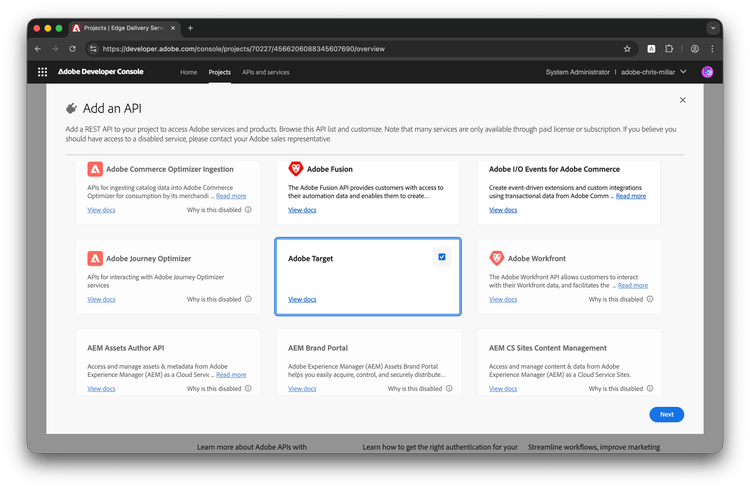
In the Add an API dialog, find and check the Adobe Target API and click Next.
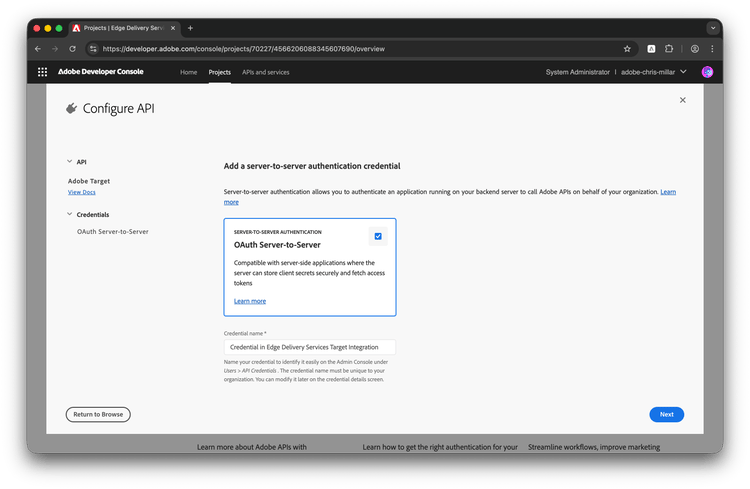
- In the Configure API wizard, you will be prompted to name the credential. This will be pre-populated or you can choose your own.
-
Click Next.
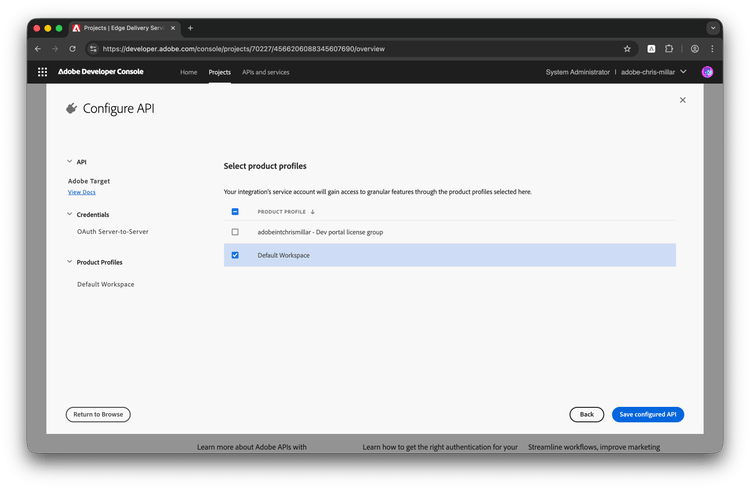
- Select which profiles you want your integration to have access to. By default, the integration will have access to all product profiles.
- Click Next.
-
Click Save configured API and the wizard closes. Keep the browser tab open.
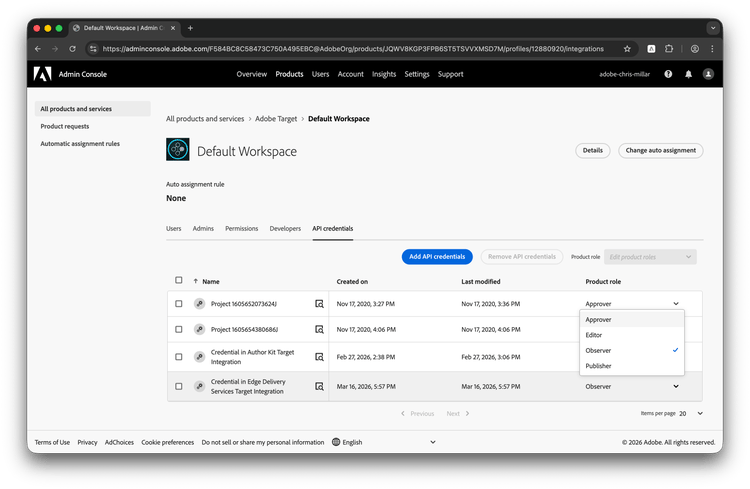
- In another browser tab, visit https://adminconsole.adobe.com/ and update the product role to Approver or the role that best suits your needs.
- For more information about target permissions, please see the Adobe Target documentation.
-
For more information on how to use the Admin Console, please see the Admin Console documentation.
-
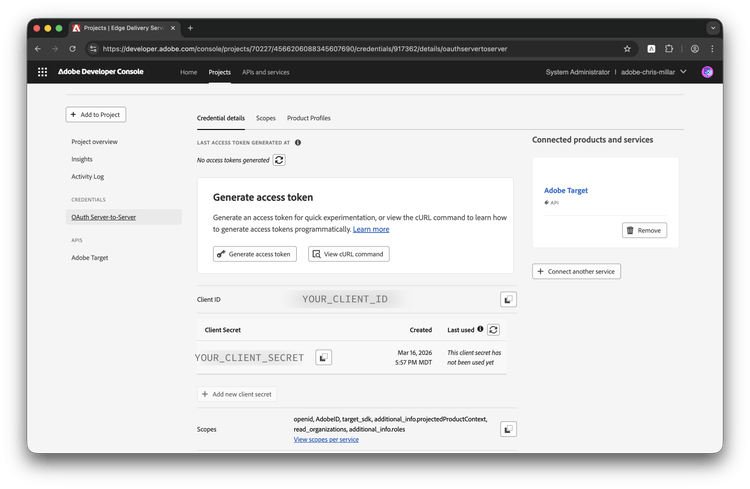
Return to the browser tab with the Developer Console and navigate to the credential details page and copy your Client ID and Client Secret.
-
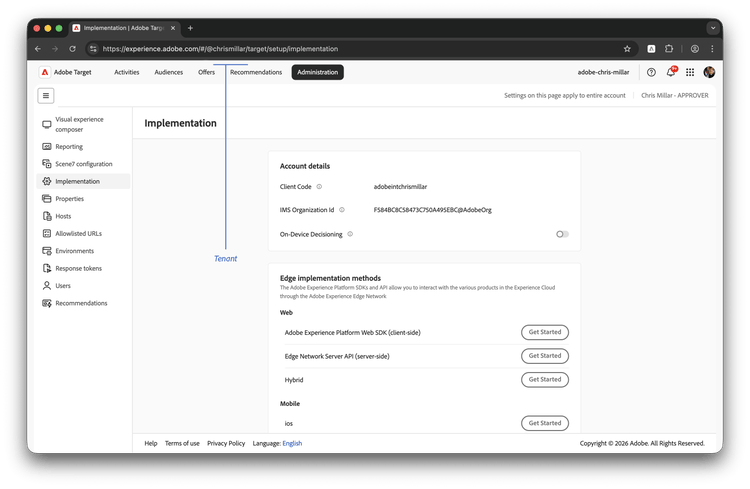
Sign into Adobe Target and note your tenant name. This will be the human-readable name after the @-sign in the Adobe Target URL.
Add Adobe Target credentials to Experience Workspace
- Now you can provide Experience Workspace with the credential information you copied from the Developer Console and Adobe Target.
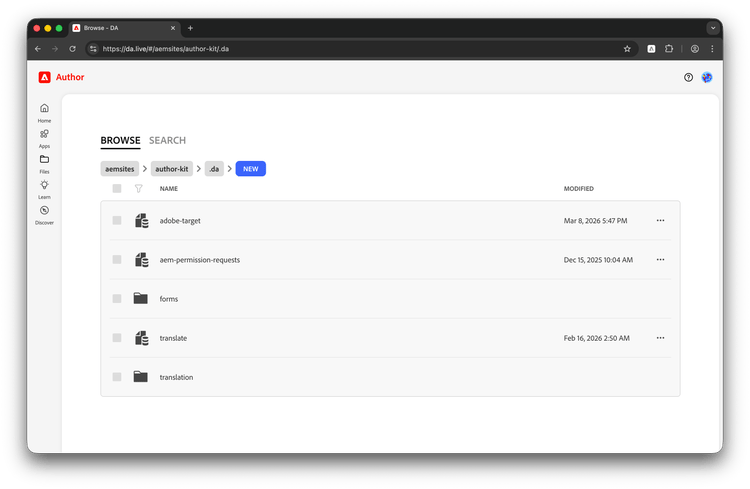
- In a new browser tab or window, browse to your project's hidden
/.dafolder:https://da.live/#/{ORG}/{SITE}/.da - Make a new sheet called
adobe-target.-
If you wish to allow only some authors to use the Adobe Target integration, you can set specific permissions to prevent unwanted use.
-
If you wish to allow only some authors to use the Adobe Target integration, you can set specific permissions to prevent unwanted use.
- Create the following rows in the config sheet, substituting the values from Adobe Target and Adobe Developer Console.
| key | value |
tenant |
YOUR_TENANT_NAME |
clientId |
YOUR_CLIENT_ID |
clientSecret |
YOUR_CLIENT_SECRET |
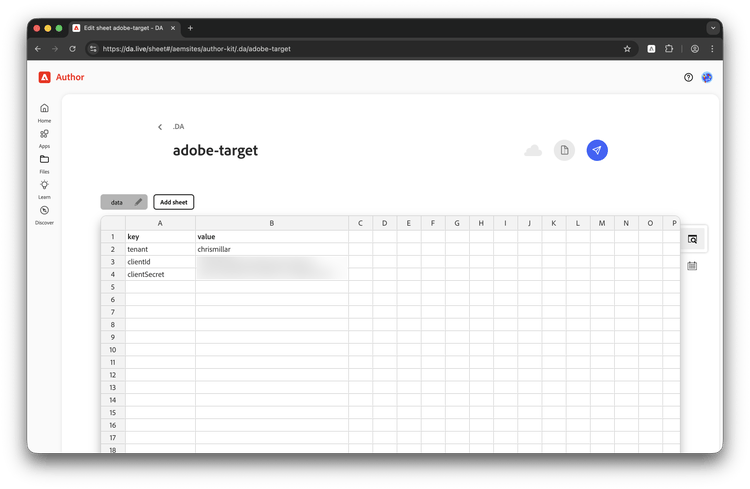
Do not preview or publish this file.
Enabling Send to Adobe Target
Finally, you enable the Send to Adobe Target plugin in the Prepare menu, which will use the secrets you provided.
- Edit your site config or org config.
- Add the following row to the
preparetab or create thepreparetab if it does not yet exist.
title |
path |
icon |
ref |
Send to Adobe Target |
Because this is an Adobe-provided plugin, the path field is not required. Experience Workspace will resolve the plugin by its title.
Using Send to Adobe Target
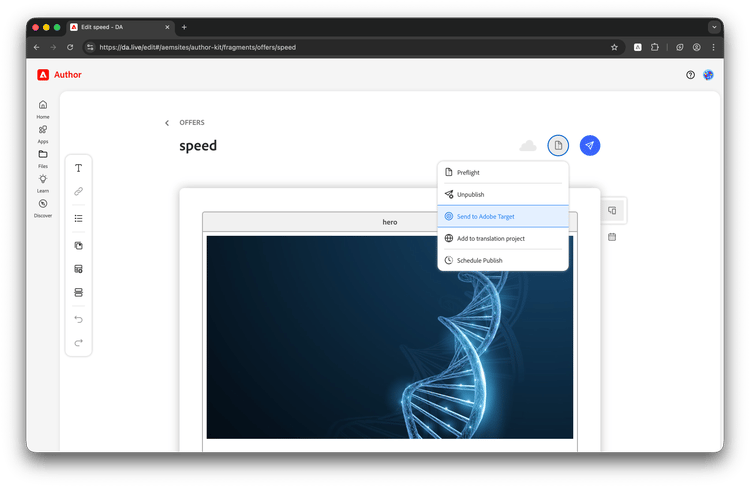
- Open a page or fragment in Experience Workspace.
- Click the Prepare menu button.
- Select Send to Adobe Target.
- A dialog will pop up.
- If an existing Offer is found, you will be prompted to update or delete it.
- If an existing Offer is not found, you will be prompted for a name.
- Send / update the Offer.
Your page will automatically be previewed, and its content will be sent to Target.
Limitations
- Only pages and fragments are supported. Sheets and media files cannot be sent to Target.
- All content below the main tag will be sent to Target. This will be all undecorated sections of your page or fragment.
- The content is sent as an immutable XF HTML Offer to prevent unwanted tampering within Adobe Target.
- The source of truth will be Experience Workspace.
- If you wish to update or delete this offer, it should be done from Experience Workspace or by using the Adobe Target API directly.
- You can rename or update the content of existing Offers, but you cannot delete any Offer associated with an Activity.
Delivery
Most projects will have their own setup for how Adobe Target should be delivered on a page. This could be anything from using alloy.js, to at.js, to a custom integration through Google Tag Manager. This includes whether or not to use VEC or a form to create an activity.
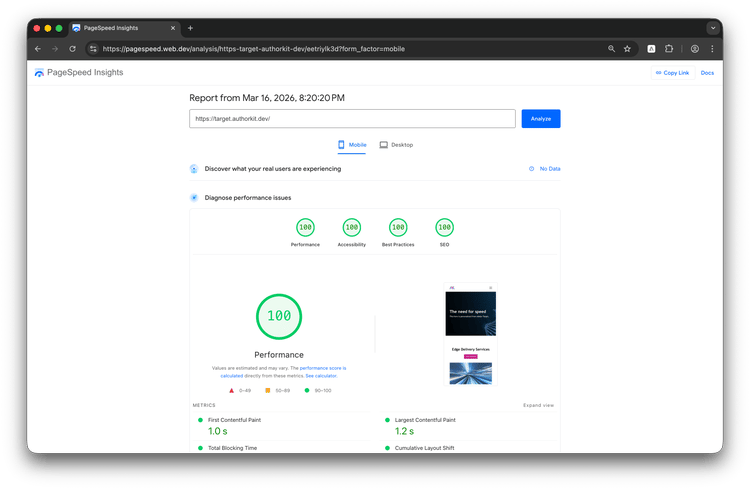
The notes and sample code below are an example that provides a path to good performance while balancing developer experience, complexity, and the personalization admin's experience.
Sample code
The following has been taken from the Adobe Target integration on Author Kit.
scripts.js (Javascript)
async function loadTarget() {
  // Check for target metadata flag
  const targetMeta = getMetadata('target');
  if (targetMeta) {
    // Overwrite target domains to be same origin
    window.targetGlobalSettings = {
      serverDomain: hostnames[0],
      secureOnly: true,
      overrideMboxEdgeServer: false,
    };

    // Import the local copy of at.js
    await import('../deps/at/at.js');

    // Request all the relevant offers for the page
    const offers = await window.adobe.target.getOffers({
      request: { execute: { pageLoad: {} } },
    });

    // Loop through them and inject if they exist
    offers?.execute?.pageLoad?.options?.forEach((opt) => {
      const { cssSelector, content } = opt.content[0];
      const el = document.querySelector(cssSelector);
      if (el) el.outerHTML = content;
    });
  }
}

export async function loadPage() {
  await loadTarget();
  // DOM updated, decorate as usual
  await loadArea();
}
await loadPage();
Below is a sample Cloudflare Worker function to proxy Target requests through your production domain. It is loosely based on the Edge Delivery Cloudflare reference implementation.
target.js (Javascript)
export default async function fetchTarget({ url, env, savedSearch, originalRequest }) {
  const corsHeaders = {
    'Access-Control-Allow-Origin': '*',
    'Access-Control-Allow-Methods': 'POST, OPTIONS',
    'Access-Control-Allow-Headers': 'Content-Type',
  };

  // Handle CORS preflight
  if (originalRequest.method === 'OPTIONS') {
    return new Response(null, { headers: corsHeaders });
  }

  const targetUrl = new URL(url.pathname + savedSearch, `https://${env.TARGET_HOSTNAME}`);

  const response = await fetch(targetUrl, {
    method: originalRequest.method,
    headers: {
      'Content-Type': 'application/json',
    },
    body: originalRequest.body,
  });

  // Add CORS headers to response
  const newResponse = new Response(response.body, response);
  Object.entries(corsHeaders).forEach(([key, value]) => {
    newResponse.headers.set(key, value);
  });

  return newResponse;
}
Non-Edge Delivery Services surfaces
The Adobe Target Offers created from Experience Workspace are semantic HTML that can be delivered to any surface that can accept this type of content. There are two common ways to handle this type delivery:
- Let the delivered Offer use the existing surface's CSS and JavaScript - This is useful for default content you may want to push out to other surfaces.
- Wrap the delivered Offer in an AEM Embed Web Component - This creates an encapsulation of styles and client-side logic that mimics the exact same experience someone would have on an Edge Delivery surface.
Tips
- Turn off "Page load enabled (Auto-create global mbox)" - This will have Adobe Target defer injecting content to your own client-side code which will improve performance and provide greater control over when the content is put into the page.
- Only "target" divs directly under the main element with offers from Experience Workspace - This strikes a good balance of predictability and tediousness. It allows Edge Delivery page and section decoration to simply work as-is without any custom code. It also provides more granular control vs only being able to personalize an entire page (which you can still do).
- If using alloy.js, defer all analytics, telemetry, and non-critical calls to post LCP - If it does not paint a pixel, it does not belong in front of LCP.
- Ensure all calls to Target are using the same delivery origin as your actual website - By mapping all requests to Adobe Target behind the same origin, browsers do not have to pay for a "DNS tax" to perform handshake operations (IP lookup, SSL cert download, etc.). In synthetic benchmarks, this will save at least 500ms.
- Avoid delivering fragment links from Adobe Target - It may be enticing to simply send links to Adobe Target and have the delivery project fetch them. This should be discouraged as it creates chaining issues which will slow down your page. Having Target deliver the exact HTML you need in the same response as it serves its decisions saves considerable time in delivery.
- Use a metadata flag to turn Adobe Target on or off - This creates intentionality in your testing program as well as creating visibility to your D2D content authors. Additionally, LCP can always use as much bandwidth as it can get. Even at.js, which is the smallest path to deliver Adobe Target, costs 30KB.