
Authoring sheets
Sheets allow you to manage structured, tabular data within Experience Workspace.
Overview
Sheets are useful for managing data such as placeholders, configurations, and metadata. Sheets have a familiar layout to spreadsheets you already know featuring rows, columns, and tabs. Because of the familiar tabular layout of sheets, sheets have their own editor.
Creating sheets
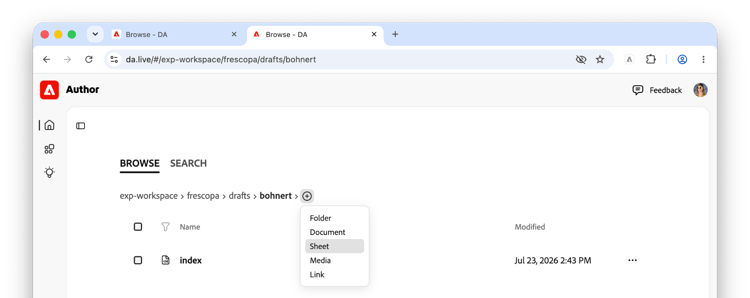
- From the content browser, navigate to the folder where you want to create a sheet.
-
Click the add icon at the end of the breadcrumbs and select Sheet in the drop-down menu.
-
Name your sheet and click Create.
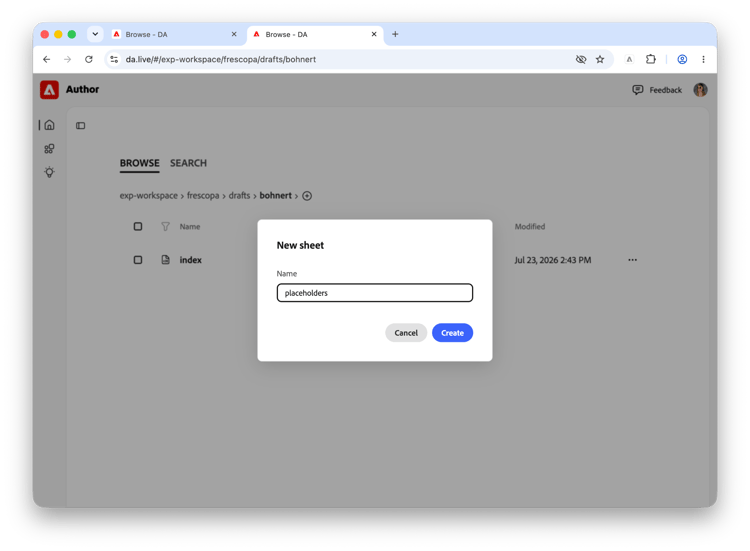
All sheet tabs are public by default. Because sheets are targeted towards public web content, all sheets are public by default. If you would like a sheet to be private, you can prefix the sheet name with private-.
Editing sheets
The sheets editor is familiar for spreadsheet users.
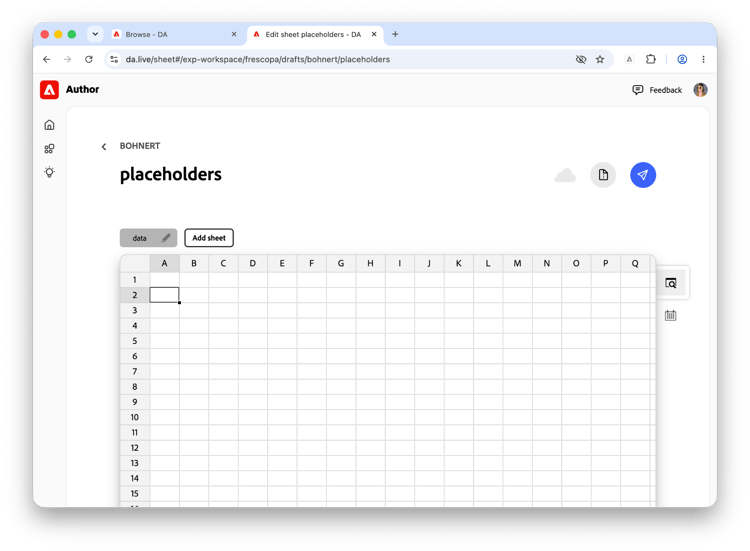
The top of the editor has the document information and document actions.
| Icon | Option | Description |

|
Document folder and name |
Click on the folder name to return to that folder in the content browser. A padlock icon indicates that you do not have permissions to edit the sheet. |

|
Status | The status icon shows when the document is synching or when you have lost your connection. |
|
Prepare | Access the prepare menu to take actions such as preflight checks. |

|
Publish | Preview or publish your sheet to make it accessible to your reader. |
Above the sheet editor, you can switch between tabs of the sheet by clicking the tab. You can also add and manage the tabs of the sheet.

| Icon | Option | Description |
|
Active tab | The currently selected tab is dark gray. |
|
Other tab | Other tabs are displayed in light gray. |

|
Edit | Click to edit the tab name. |

|
Apply | Click to save the changes to the tab name. |

|
Cancel | Click to reject the changes to the tab name. |

|
Delete | Click to delete the tab. |

|
Add sheet | Click to add a tab to your sheet. |
The sheet editor itself is laid out like a common spreadsheet editor with rows and columns.
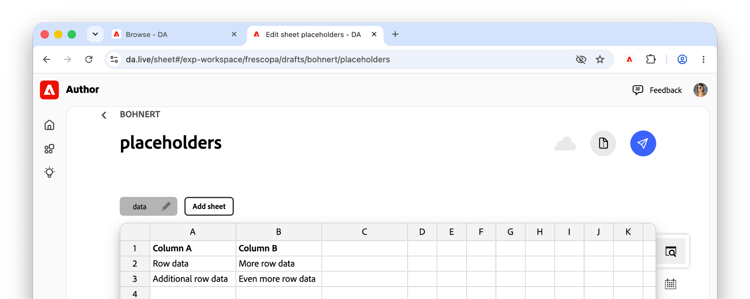
Content is saved as you type. Use right-click to reveal a menu with additional table options.
- Insert a new column before
- Insert a new column after
- Delete selected columns
- Rename this column
- Order ascending
- Order descending
- Insert a new row before
- Insert a new row after
- Delete selected rows
- Copy (Command+C or Control+C)
- Paste (Command+V or Control+V)
- Save as (Command+S or Control+S) to save the document locally as a .csv file
Experience Workspace sheets are designed for basic tabular data management. If you require conditional formatting, formulas, or have 10,000+ rows, we recommend you keep this content in SharePoint / Google Drive and use AEM's content overlay feature.
Please also see the document Limits.
Preview and publish
Just as with editing documents, sheets are not available to the public until you either preview or publish them.
- Preview is intended for soliciting feedback by providing a public, but non-production link to the document (by default under the aem.page domain).
- Publish pushes the content to a production link (by default the aem.live domain).
Simply click the publish icon at the top of the sheet editor to preview or publish.
Unpublish using the Prepare icon.
Version history
Not only does Experience Workspace save your sheet as you edit it, it also maintains a version history.
Access the version history using the History tab on the right edge of the sheet.

See the document Versioning and history for more information.